Showing posts with label stock. Show all posts

October 10, 2011

Chicken Broth

When I sat down to write this post I thought I should poke around online and try to find out what the difference is between stock and broth. I've heard lots of different things before, like that one has bones and the other doesn't, or that one has vegetables and the other doesn't. I just wanted to clear it up in my own mind, once and for all. So I googled it. And do you know what I found out?I found out that a lot of other people have asked this same question.

And although some sources out there claim to know the answer, I don't think that they really do.

So here's what I decided... it doesn't matter. It's stock. It's broth. It's stockbroth. And no matter what you call it, it's handy to have around.

I like to keep plenty of stockbroth in my pantry. I've talked about something I call seasonal stock here before. And I've talked about a roasted pork broth, too.

Today I'm talking about chicken broth.You've probably made chicken broth before. But I am blogging about it anyway because I want to.

My eyes popped right out of my head when I noticed the price of chicken broth at the store the other day. Holy cow. (Or should I say, "holy chicken?") And I realized just how much more value you get even if you purchase the chicken meat.

(By the way, I would be lying if I claimed to have never bought chicken at the store myself. True confession: at the moment I only have a few little laying hens and I don't want to butcher any of them so I recently purchased chicken at the grocery market myself.)Relax, girls.

Chicken broth can be made out of any cuts of chicken. Usually I pick through the pieces and slice some meat off the bones and freeze it for times I want to use deboned chicken in a recipe. Then I simmer the leftover bones (with meat still on them because I'm not a very good chicken cutter). One whole chicken (or package of inexpensive cuts) will yield pieces of deboned chicken, some bits of simmered chicken that you pull off the bones after simmering the broth, and all the broth you can stand.

But chicken broth can also be made from a leftover roasted chicken. Just simmer the carcass after most of the chicken meat has been picked off. This makes an especially flavorful broth.

Sometimes, when I've had a mean old tough rooster, I have thrown him in the pot whole after he's been butchered and cleaned. (I hope this kind of talk doesn't turn anybody off... hello? Vegetarians? Are you still there?)

Anyway, for anyone who is still willing to keep reading, making broth is incredibly easy. Put your chicken pieces into a pot. Cover with water. Add some vegetables if you're an overachiever. (I don't usually add vegetables and I'm definitely not an overachiever.) Then simmer it for a few hours.Later, after it has cooled, skim the fat, remove the chicken parts, and strain the broth. I leave it unsalted.

At this point in the process I usually have an interested audience watching me in the kitchen.The strained broth can be frozen or pressure canned. To can it, pressure process quarts of broth for 25 minutes at the correct pressure for your altitude. I like to can broth in various sized jars so I can always grab whatever amount I need.The National Center for Food Preservation has a nice guide for making and canning stocks and broths here. They have a very informative site that's worth visiting.
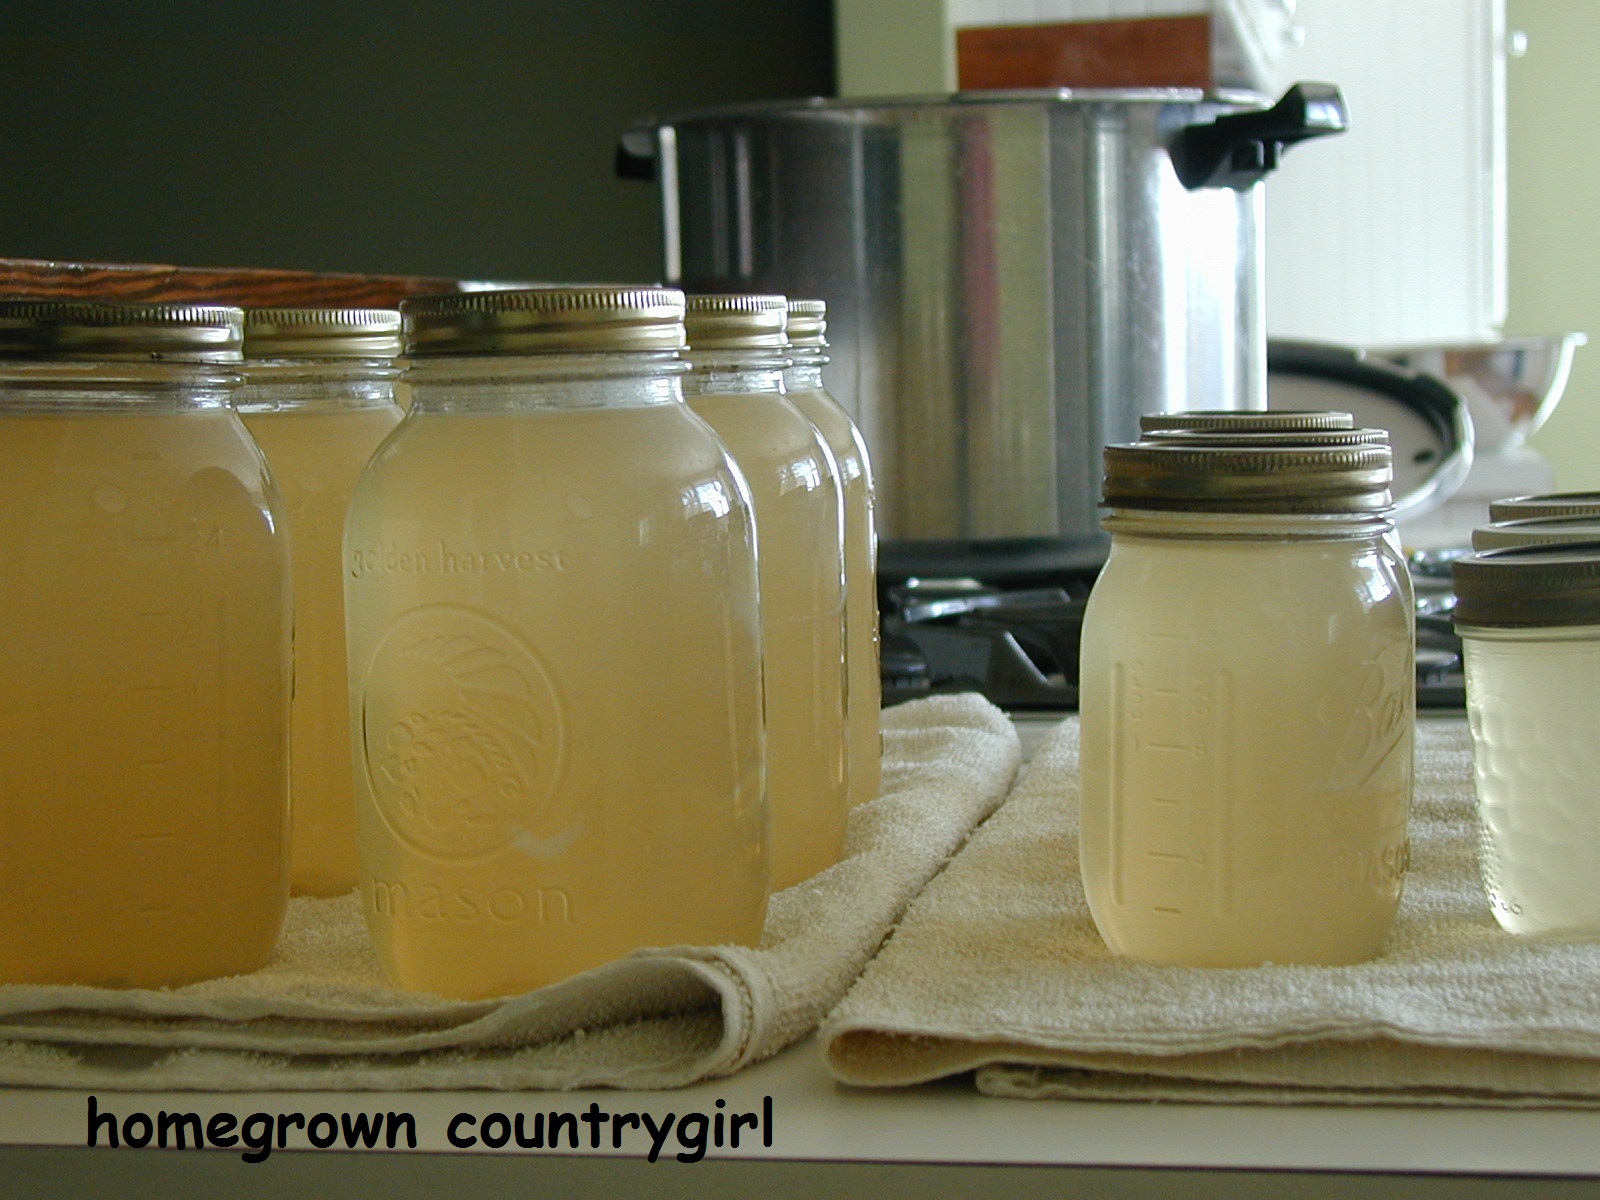
The Ball company also has a nice site and they have shared their directions for making stocks and broths here. And of course there's their Ball Blue Book which is a great guide to home canning. I also like the Ball Complete Book of Home Preserving.

September 11, 2011

What to Do with Overgrown Green Beans

One of my favorite things about summer is getting to eat this meal.

It's so simple yet so delicious.

You know those green beans that you should have picked a few days ago? Those beans that you now think are probably too big and too tough? Use those beans to make this!

Generally I like fresh green beans to be slightly crunchy. I like to steam them just a little bit, so that they are still bright green and have some bite to them. But this meal is different. In this dish the beans cook for quite a while with small potatoes and a meaty smoked ham hock. Those large, tough beans soften and absorb some of that smoky ham flavor without becoming soggy. They retain their shape and their bite.

On a hot day I like to cook this outside on campfire or grill coals, but I have also cooked it on my kitchen stove.I've never measured any of the ingredients for this because nothing needs to be measured. Just throw the ingredients into a dutch oven and let it simmer for a while.

This is always a crowd pleaser!DUTCH OVEN GREEN BEANS, HAM, AND POTATOES

A meaty smoked ham hock
Small potatoes (or larger potatoes, quartered)
Large green beans
A little bit of chopped onion and/or minced garlic
A generous chunk of butter
A tiny pinch of sugar
Salt and pepper
Water or chicken broth

Place ham hock in bottom of dutch oven. Add remaining ingredients. If cooking on kitchen stove add enough water or chicken broth to half cover ingredients. (If cooking on campfire or grill coals use enough water or broth to almost completely cover ingredients.) Cook until potatoes and green beans are tender and meat is falling off hock (probably about an hour and a half). If using small tender green beans instead of larger tough ones, don't add them until after the potatoes and hock have already partially cooked.

June 5, 2011

Mushroom and Garlic Pot Roast

I affectionately refer to this as "My Favorite Pot Roast."But don't tell the other pot roasts I said that!

Truth be told, my favorite pot roast is always whatever pot roast is piled on the plate in front of me, regardless of the form it takes.

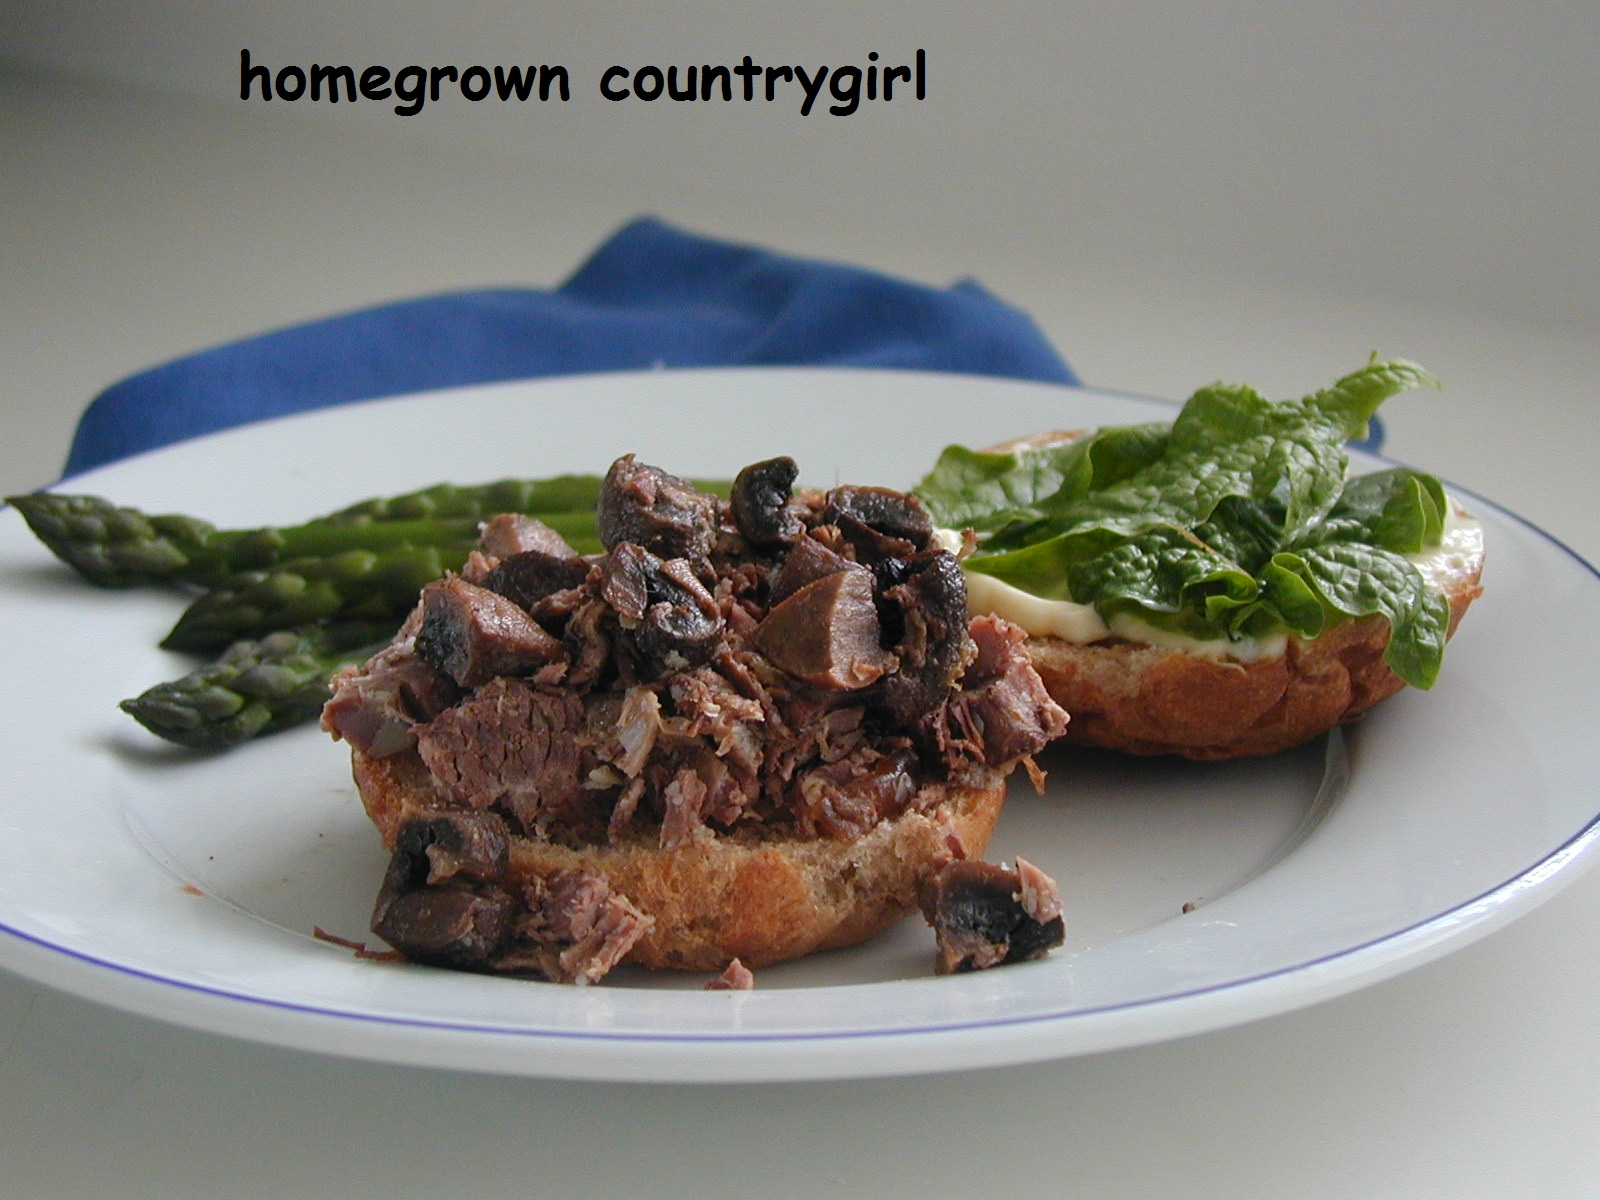
Sometimes I make a whole pot roast just so I can make it into sandwiches!

As with all pot roasts, this one just takes a little bit of preparation. Then it sits in the oven and does its own magic without any sort of intervention... so cooks and countrygirls and other busy folks can get stuff done while it is cooking.

Pat the meat dry and sprinkle some salt and pepper on it.I always use coarse salt and a pepper grinder when I season the meat. It makes me feel fancy.

Smash and peel some garlic cloves.I leave small ones whole but I cut larger ones in half. (The garlic simmers and turns so sweet and delicious while cooking.)Slice up a large onion.And brush the dirt off of a whole bunch of mushrooms.I didn't grow these mushrooms! I got them at the getting place.I would leave small mushrooms whole but these were giants so I quartered them.

Then I pull a frozen sprig of rosemary out of the freezer.In the summer, when herbs are at their peak, I cut, vacuum pack, and freeze some sprigs of different herbs to use in soups, stews, and roasts the rest of the year. This works great... they add flavor to things just like fresh herbs would and they take up only the tiniest bit of freezer space.

I get the wine and chicken broth ready...I heat some olive oil in my roasting pot and sear the meat a few minutes on each side so that it browns a bit. Then I remove the meat and stir the onions around in the pot for a couple of minutes.

Then I remove the onions, too. The bottom of the pot looks brown and burnt by now... but then I pour in the wine and it helps to release all those delicious brown bits from the pot.

Then I add the broth, some seasonings, and put the meat and onions back in the pot. I also add the herb to the pot.I dump the mushrooms on top and grind a bit of black pepper (and throw a bit more salt) over them.Then I put this in the oven for a long time. It makes the house smell so good...

I like to ladle the hot roast (and the delicious broth it makes) over a pile of mashed potatoes but this time I lost track of time and didn't have the potatoes ready.

I couldn't wait. The house smelled so good and I wanted to eat some right away. No potatoes, no photos, and no napkin. I just ate a big bowl of it.

And then I ate another one.

After a couple of helpings I didn't even miss the potatoes (or the napkin).

But look! There was still plenty left for making sandwiches the next day!MUSHROOM AND GARLIC POT ROAST

a 2-3 pound cut of roasting beef
salt, pepper
2-3 tablespoons olive oil
2 cups sliced onion
1/2 cup red wine
1 pint chicken broth
1 teaspoon worcestershire sauce
1 teaspoon liquid smoke
a whole lot of whole or halved garlic cloves, slightly smashed
a sprig of herb (I used rosemary this time)
8 cups whole, quartered, or sliced mushrooms
more salt and pepper

Preheat oven to 300 degrees. Pat meat dry and sprinkle generously with salt and pepper. Heat oil in dutch oven over high heat on stove top. Sear meat 3-4 minutes on each side to make it nicely browned and flavorful, then remove it from pan. Add sliced onions to pot and stir them around until they are slightly softened and have a tinge of tan color, but be careful not to burn them. Then remove onions from the pot, too. Turn off heat and immediately pour in wine to deglaze pan. Add chicken broth. Add worchestershire and liquid smoke. Return meat and onions to pot and add garlic. Place sprig of herb into pot. Add mushrooms. Sprinkle with more salt and pepper. Put lid on dutch oven and place pot in oven. Cook for at least an hour per pound of meat, plus probably one extra hour. It could take even longer, depending on the shape of the meat. A thin cut of beef will cook and get tender much faster than a thick wedge... but the house will smell glorious the whole time this is cooking.

January 17, 2011

Blue Monday Pot Roast

Everyone has an occasional blue day. It happens to all of us. It sometimes even happens to good natured countrygirls. Yes, it's true. We get blue, too.

According to some bean counters, a lot of folks have the blues today. They say that January 17th is the saddest day of 2011.

Others say the saddest day of 2011 is next Monday, January 24th.

This countrygirl thinks a case could be made for any Monday in January being the saddest day of the year. and I think there are others who might come on board with that observance.

Luckily, I have a remedy for sad January days... Blue Monday Pot Roast.

It's simple. It's delicious. And it makes the house smell really good. The aroma itself might lift your heart and pull you through the blues.

This is comfort food, homegrown comfort food, using ingredients that are readily available in January.

I leave my brussels sprouts in the garden through winter, breaking frozen sprouts off the stems of the plant when I want to eat them. Believe it or not, they are extra sweet and tasty this way. Parsnips can be dug in the fall and stored in buckets of dirt just like carrots. Herbs can be vacuum packed in individual bags and stored in the freezer for a very long time. And I've found that even if you don't raise your own cattle, you can sometimes make a nice trade with a friend, bales of hay in exchange for some home raised beef. Win. Win.

So the next time you're feeling the January blues, try this...BLUE MONDAY POT ROAST
(Adjust amounts and ingredients to your own tastes and what you have available.)

3 pound cut of roasting beef
black pepper
coarse salt
1 cup chopped onion
2-3 tablespoons olive oil
1/2 cup red wine
a splash of liquid smoke
a splash of worcestershire sauce
2-3 cups chicken stock
1 sprig rosemary (or herb of your choice)
6-8 cloves of peeled whole garlic
2 cups brussels sprouts. cut in half, if desired
2 cups chopped parsnips
2 cups chopped carrots
4-6 frozen roma tomatoes
additional black pepper and salt

Preheat oven to 300 degrees. Pat meat dry and sprinkle liberally with pepper and coarse salt. Set aside. On stove top, heat olive oil in large (5-7 quart sized) dutch oven style pot and add onions. Cook onions, stirring occasionally, over medium heat for about 10 minutes, until they start to soften and even have a few brown spots on them. Remove onions and set aside. Increase heat to high so oil is very hot and brown each side of roast for 3-4 minutes. You want some seared looking spots on the meat. Remove meat and set aside. Add wine and deglaze bottom of pot, gently scraping up the brownish bits. Add a couple cups of chicken stock, a splash of liquid smoke and a splash of worcestershire sauce. Turn off stove burner. Put beef back in pot and add additional chicken stock, if necessary, so that meat is about half deep in stock. Dump browned onions back in. Push sprig of rosemary down into liquid. Add garlic, brussels sprouts, parsnips, and carrots. Place frozen romas on top. Sprinkle with additional salt and pepper (watch amounts of salt and pepper if using salted chicken stock). Cover pot, place in oven, and cook about 3 hours (1 hour per pound of meat at 300 degrees).

For some true comfort, serve with mashed potatoes (special occasion mashed potato recipe here) or buttermilk biscuits.

January 11, 2011

Butternut Lentil Soup

True Story: One time someone gave me a baggie of ground dehydrated hot peppers. I promptly stuck my nose in the bag and took a big whiff. I thought I was going to die. End of story.

I obviously lived to tell of it. But my advice to you is this: If someone gives you a baggie of ground up dehydrated hot peppers, don't put your nose in there and smell it.

It's like being sprayed with mace. (Not that anyone has ever had to spray mace at me.) (Really.) (Please believe me.) (I'm serious.)Let's get back to these peppers...

I carefully poured these ground peppers into a spice jar with a nice fitting lid and labeled them "HOT."

I use them all the time.

To make your own "HOT," grow a variety of hot peppers, dehydrate them in a dehydrator, grind them up, then put them in a baggie and give them to an unsuspecting countrygirl who you know will stick her nose in there and smell it.And please try not to laugh.

Cumin is another spice you can grow yourself, even in chilly climates. (I'm in zone 5 and I grow it.) But the slightest frost will kill a cumin plant, so wait until all threat of frost is gone before planting seeds. Let the plant grow all summer until it goes to seed. Let the seeds dry on the plant. Then just pick them off and put them in a jar before they drop off the plant. I keep those seeds in my pantry and smash them up with a mortar and pestle just before I use them. It doesn't take very many freshly smashed seeds to make something taste like cumin. (Don't forget to save some seeds to plant more cumin the next summer!)Now use cumin and something "hot" to make this delicious soup! BUTTERNUT LENTIL SOUP

1 cup diced onion
2-4 cloves garlic, chopped
2 tablespoons olive oil
1/4 teaspoon cumin seeds, freshly smashed (increase to 1/2 teaspoon if using a jar of store bought ground cumin)
1/2 teaspoon ground "hot" spice of your choice (chipolte powder, cayenne pepper, crushed red pepper flakes, or chili powder... although you may want to reduce the amount of cumin if using chili powder since chili powder usually has cumin in it)
1 quart vegetable stock (instructions for making your own here)
2 cups any color of dry lentils
2 cups finely diced or shredded carrots (easy winter carrot storage system here)
4 cups finely diced or shredded butternut squash
8-10 frozen roma tomatoes (may substitute with 1 quart or 1 large can of tomatoes, undrained)
1 (1 to 2 ounce) parmesan cheese rind (optional)
1/4 teaspoon salt (wait and add later, if using vegetable stock with added salt)
1/4 teaspoon pepper

Saute diced onion in olive oil in a large soup pot for about 10 minutes until onion begins to soften. Add garlic, ground cumin, and "hot" spice. Stir and saute for a few more minutes, just until garlic and spices become fragrant.

Pour in vegetable stock. Add lentils, carrots, butternut squash, tomatoes, and parmesan rind.

Cover pot and simmer over very low heat for a few hours until lentils and vegetables are soft. Stir occasionally to keep from burning and to help break up tomatoes. Add salt and pepper after lentils and vegetables have cooked.

Remove a few cups of soup, let cool slightly, puree in blender until smooth, then stir pureed soup back into the pot of un-pureed soup. (Options: Add more vegetable stock at this time, if you'd like a "soupier" soup... or add a can of evaporated milk at this time, if you'd like a creamier soup.) Adjust seasonings to taste.

Grate a bit of parmesan cheese over top when serving.

December 2, 2010

Slow Roasted Pork and Gravy, Fast

Not only is this hot, gratifying comfort food. It's also fast food, homegrown style. And it's one of my all time favorite meals.

Want a pork roast just for one or two without the fuss? It's the holidays and there's just not enough time for everything? Hungry kids want something good and filling right now? Unexpected guests showed up? Or you'd like to prepare a simple, gratifying meal for an ill neighbor? This is the answer to all those situations.

Keep some jars of this in your pantry and you'll be ready any time you need to make a meal for any number of hungry folks in a hurry. It tastes like you worked two days to prepare it. And it will have that unmistakable "better the next day" pot roast taste.

Hey, don't act all innocent... you know exactly what I am talking about. Tell me that none of you out there have heated up some leftover pot roast for breakfast because it's all that you could think about the next morning...

Oh, yeah.

I knew it. (Me, too.)

Here's how I do it: Start with a nice cut of roasting meat. You can use pork or beef, whatever you fancy (and have on hand). This time I used a large pork loin. I rubbed it with salt, pepper, thyme, rosemary, minced garlic, and brown sugar. I used pickling salt since I planned to can it. Then I placed it in an electric roaster with some seasonal stock and cooked it all day, low and slow.

After enjoying some of the roast that evening I let it cool to room temperature and then I put it in the fridge overnight.

The next day I skimmed the fat off the top, cut the meat into chunks, and strained the stock. Then I reheated the meat with some of the stock, packed it into hot jars, and processed as usual for meats. Remember the National Center for Home Food Preservation is a good free resource for safe canning instructions and guidelines.

I canned the remaining strained stock by itself.

To make "Slow Roasted Pork and Gravy, Fast," prepare a roux of butter and flour, slowly stir in a jar of the canned pot roast stock and whisk. Stir in a jar of the canned slow roasted pork. Continue heating until it is thickened to the consistency you like. Taste and season as desired. (It may not need additional salt or seasoning since you used that delicious pot roast stock.) Serve over mashed potatoes, noodles, biscuits, or toast and really "wow" those unexpected guests!

July 6, 2010

Chicken & Dumplings. And a Confession

First, the confession... I was too hungry and too greedy and too undisciplined to take a picture of the Chicken & Dumplings last night. I just grabbed my spoon and dug in and ate until I was a lethargic glutenous blob of chicken & dumpling doo.

Sorry.

I should have thought of you and taken a picture of it.

But we're in luck.

Despite my bad behavior last night, a small amount of Chicken & Dumplings survived the attack. I found this little container in the fridge this morning. This photo is of cold, day old, globified Chicken & Dumplings.

And it's just as good this morning as it was last night. I'm eating it, cold, right now. It's like a drug. A comfort food drug.

But this is easier to get than drugs. All you have to do is raise some chickens, take care of them for a few years while they're laying eggs, feed them, give them fresh water, keep them warm in the wintertime, and clean the their coop. Then butcher them, clean the carcasses, simmer them in a great big pot of water, pressure can the meat, pressure can the stock, grow the rest of the makings in your garden, freeze your peas, store your carrots, dry your herbs, and then make this E-Z recipe.

Ok. You're right. Maybe drugs are easier to get.

But eating Chicken & Dumplings will give you a better high.

No lie.

If you don't have the time or place to grow your own ingredients you can certainly pick up all of these ingredients at your local grocery or farmer's market.

CHICKEN & DUMPLINGS

3-4 cups vegetables: fresh or frozen peas, chopped carrots, and chopped celery*
1 1/2 quart jars chicken stock (or use 2 whole quarts if you like it a bit soupier)
1 pint jar of chicken
to taste: salt, pepper

2 cups cake flour**
1 heaping tablespoon baking powder
pinch salt
black pepper, sage, rosemary, thyme, or other seasoning of choice (optional), to taste
2 Tablespoons melted butter
1 cup milk

chopped fresh parsley, if available

* I use frozen peas and carrots from storage. For much of the year I don't have fresh garden celery. At those times I just increase the amount of peas and carrots and I throw a pinch of dried celery leaves into the pot. I like a bit of celery taste in this dish. You can use any vegetables you wish. I use peas, carrots, and celery because they make this taste like comfort food to me. Sometimes I add in some chopped, carmelized onion or minced garlic and I have also occasionally added some diced potatoes when I'm really geeking for some starch.

**Cake flour will make slightly lighter, fluffier dumplings. If you don't happen to have cake flour on hand, just use all purpose flour. The dumplings will be just as tasty.

Pour chicken stock into large stock pot. Add carrots and celery. Simmer until vegetables start to soften. Add peas and pint of chicken. Continue heating until mixture returns to a simmer. Add salt and pepper to taste.

Whisk cake flour, baking powder, salt, and optional seasoning in a bowl. Melt 2 tablespoons of butter and pour into a one cup measure. Add milk to equal 1 cup. Stir together. Pour milk and butter into flour mixture and stir just until batter is combined.

Using a spoon, drop golf ball sized portions of batter into simmering pot. Let each dumpling lay where it falls, don't stir them around in the pot. You will get about 16-18 dumplings from this batch of batter. Cover pot and let simmer, without lifting lid, for 15 minutes. The dumplings will fluff up and thicken the sauce as they cook.

Remove from heat and stir, just once around the pot, very gently. Let cool briefly before serving. This is hot!

If you have fresh parsley, chop some and sprinkle it over each serving.

April 13, 2010

Roasted Butternut Squash Soup

Plant your butternut squash seeds in the summer and harvest the squash in the fall. Wait for a dry sunny day after they have fully matured. Break them off of the vine, leaving one to two inches of the stem intact. Put them in a cool, dry place, preferably a root cellar, if you have one (I don't).

I keep my winter squash in a wooden crate that Countryboy built for me. I line it with clean straw and place the squash between more layers of straw. This works like a charm.

Do this, and you can enjoy butternut squash for months. (Some other winter squash, like Delicata, also last a long time when stored like this.)

But nothing lasts forever. By March I usually see a few dark spots on any remaining squash. At this time I roast the squash in the oven, scoop out that pretty orange flesh into plastic bags and freeze it.

Roast whole squash in a 400 degree oven for 1-2 hours, until a knife inserted into the fleshy top part pushes in without resistance. Remove, cool, and scoop out the flesh, discarding the seeds and fiborous bits from the middle of the bulb end. If you have a vacuum sealer you may want to use it to package your roasted squash, but this isn't necessary unless you plan to store it in the freezer for a long time. I usually just scoop mine out into ordinary resealable freezer bags. I like to freeze foods in amounts that I will use them. In this case I usually put about 4 cups of butternut in each freezer bag because that is the amount I use when I make this smooth, rich, delicious Roasted Butternut Squash Soup...

ROASTED BUTTERNUT SQUASH SOUP

4 cups roasted butternut squash
1 quart canned carrots, drained*
1 quart seasonal stock
1 (12 oz.) can evaporated milk
4 tablespoons butter (Leave this out or reduce the amount if you must, but using it really brings out the rich, sweet taste of the squash.)
1/2 teaspoon garlic powder
1/4 teaspoon white pepper
1/4 teaspoon black pepper
1 teaspoon salt (Seasonal Stock contains no added salt. If you are substituting purchased vegetable broth or chicken stock that contains salt you might want to add less salt)

*Although I have previously advocated against canning carrots, I do can some for use in some recipes. Using your frozen squash and canned carrots makes throwing this soup together a snap! Seriously, you can make this soup in less than 15 minutes. But you could roast fresh butternut and fresh carrots if you wanted to do everything the long way around.

Speaking of carrots, I have a handful of last summer's carrots remaining in storage and they are still nice and crisp, even though it is now April! You can read about my fabulous carrot storage system here.

Use a blender to puree roasted butternut, drained carrots, stock, and evaporated milk together in batches. Pour each batch into a large saucepot. Stir well to incorporate all batches of puree. Add butter and seasonings. Heat to a gentle simmer. Sprinkle some crumbled bacon, fresh grated parmesan cheese, or cracked pepper into each bowl. Serve with crusty bread or garlic toast.

August 9, 2009

Seasonal Stock

About once each season I like to make a batch of what I call "Seasonal Stock." It's vegetable stock made from whatever vegetables are available at that moment.

This stock really comes in handy a lot.

You might think that summer and fall would be the only times of year that plenty of fresh vegetables would be available for making stock, but I have made some great stocks at other times of the year. Each season produces it's own uniquely tasting, uniquely colored stock.

This past January I dug parsnips from the frozen garden, brushed snow off the brussels sprouts, and added onions, carrots, sweet potato, and butternut squash from storage. This made a deep orange winter stock that was especially nice in butternut squash soup.

In May I made a spring stock that used a large proportion of greens such as spinach, lettuce, mustard, and chard, along with some chunks of turnip, asparagus, and a handful of chives and little bit of carrot that was still surviving in storage. This deep green stock made a great gravy when slow cooked with a pork shoulder.

There were a lot of vegetables available for the summer stock pictured above. I used zucchini, cabbage, onion, banana pepper, red tomato, yellow tomato, broccoli, carrot, chard, celery, carrots, rosemary, and parsley. I also threw in a strawberry and two blackberries, just for fun. Why not?

There is no recipe. I combine about two quarts of cleaned, roughly cut, loosely packed vegetables to two gallons of water. I simmer it for a few hours in a large pot. Then I let it cool and strain it through several layers of cheesecloth. Return the stock to a boil, ladle into clean, hot jars, place lids and rings, and pressure can. The Ball Blue Book (definitely one of my favorites) states to process quarts of their recipe vegetable stock for 35 minutes (at the pressure designated for your altitude). So that's what I do.

I have heard of people saving scraps of pared vegetables left over after preparing meals. Store these scraps in baggies in the freezer until there is enough to make stock. I think this is a great idea! It makes use of every bit of your precious fresh vegetables, whether they come from a garden, farm market, or supermarket. We can all do this!

There must be some sort of magic in combining foods that are available fresh at the same time together. I say this because seasonal stock always turns out well. Every time I make seasonal stock I taste it and think, "This is the best batch ever."

I wonder what that says about me.

Oh! Wait! I almost forgot to mention one very important ingredient that goes into every batch of seasonal stock... a splash of homemade wine.

Now I wonder what that says about me.