Showing posts with label berries. Show all posts

August 26, 2011

Chokecherry Chokeberry Jelly

Up until 5 minutes ago I have always thought that these were "chokecherries."
What I was unsure about was the spelling, was it two words, "Choke Cherry," or one, "Chokecherry?" So I googled it.

But what I found out was that although the bush is called a "Chokecherry," the berries are "Chokeberries."
Ooops.

Apparently this is a common mistake, so much so that the people at Kraft, who make MCP pectin and Sure-Jell pectin also call them "Chokecherries."

I don't exactly know how to describe Chokecherry (Chokeberry) Jelly. It's a lovely pink blend of sweet and tart.And it tastes delightfully old fashioned to me.Most of the chokeberries on my chokecherry bushes become ripe in August. I pick the purple ripe ones and also the less ripe greenish ones. I always use Kraft's Chokecherry Jelly recipe to make this jelly. It can be found on their site here. Although the recipe calls for MCP pectin, I have used Sure-Jell, which is also produced by Kraft, without any problems. And since Kraft shares this recipe on their website, I have reprinted it here...MCP CHOKECHERRY JELLY (recipe from Kraft Foods)

What You Need:
3 cups prepared juice (buy about 4 lb. fully ripe chokecherries)
1 cup water
1/4 cup fresh lemon juice
1 box MCP Pectin
1/4 tsp. butter or margarine (I skip this and just skim the foam.)
4-1/2 cups sugar, measured into separate bowl

Make It:
Bring boiling-water canner, half full with water, to simmer. Wash jars and screw bands in hot soapy water; rinse with warm water. Pour boiling water over flat lids in saucepan off the heat. Let stand in hot water until ready to use. Drain well before filling.
Crush chokecherries thoroughly, one layer at a time. Place in saucepan. Add water and simmer 15 min. Place 3 layers of damp cheesecloth or a jelly bag in large bowl. Pour prepared fruit into cheesecloth. Tie cheesecloth closed; hang and let drip into bowl until dripping stops. Press gently. Measure exactly 3 cups juice into 6- or 8-qt. saucepot. Add lemon juice.
Stir pectin into juice in saucepot. Add butter to reduce foaming. Bring mixture to full rolling boil (a boil that doesn't stop bubbling when stirred) on high heat, stirring constantly. Stir in sugar. Return to full boil and boil exactly 2 min., stirring constantly. Remove from heat. Skim off any foam with metal spoon.
Ladle immediately into prepared jars, filling to within 1/8 inch of tops. Wipe jar rims and threads. Cover with two-piece lids. Screw bands tightly. Place jars on elevated rack in canner. Lower rack into canner. (Water must cover jars by 1 to 2 inches. Add boiling water, if necessary.) Cover; bring water to gentle boil. Process 5 min. Remove jars and place upright on a towel to cool completely. After jars cool, check seals by pressing middles of lids with finger. (If lids spring back, lids are not sealed and refrigeration is necessary.)

Altitude Chart:
At altitudes above 1,000 feet, increase processing time as indicated. 1,001 to 3,000 feet - increase processing time by 5 min.; 3,001 to 6,000 feet - increase processing time by 10 min.; 6,001 to 8,000 feet - increase processing time by 15 min.; 8,001 to 10,000 feet - increase processing time by 20 min.
June 28, 2011

Pear Balsamic Strawberries and a Shameless Plea to my Brother

People who know me know that I love food.They also know I love to give (and to get) food gifts.

I mean, seriously...? You don't have to figure out where to put a food gift (because you put it in your belly...duh). You don't have to read a difficult manual. You don't have to put it together. And you don't have to set up cyber passwords and make electronic updates to it.

I mean, it's food, just eat it, right?But sometimes it's not that easy.

Sometimes you get a food gift that you want to use again and again... something that you want to replace in your pantry once it's gone... something that has brought so much pleasure to so many meals that you don't want to use it all up.

You dread the day that you use the last bit of it.That is what happened with this vinegar.

Please excuse the drudgy smudged label... this is good stuff and that label never had a chance to staying pretty looking.

A while back my brother and his amazing wife gifted me with several delightful bottles of olive oils and vinegars.

Olive oil? Vinegar? Yes, olive oil and vinegars... different from any others you may have ever tasted... olive oils and vinegars that are like works of art!

This is where they got them.If you ever get a chance to go to The Olive Mill, do go... because it's like a wine tasting, but with all different kinds of infused oils and vinegars. And they let you sip tastes of these delights from tiny little paper cups! How fun is that?!

But, if you can't go, order a Pear Balsamic Vinegar from them online and try this fantastic thing:

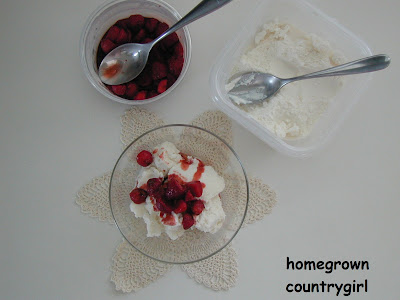
Chop up some fresh strawberries. Drizzle a bit of Pear Balsamic Vinegar over them. Stir in a little bit of sugar. Then let the bowl sit at room temperature for an hour or two... oh my goodness...Serve this over ice cream or just eat it straight out of the bowl.

You won't be sorry.

Oh, and the shameless plea to my brother...? I think you know what it is...

December 26, 2010

Strawberry Sour Cream Coffee Cake

Oh the weather outside is frightful.

But the fire is so delightful.

And since the strawberries did so well grow...

Let it snow, let it snow, let it snow!

Do you like my song? No? It was dumb? That's okay. I have something here that you will like... something totally not dumb... Strawberry Sour Cream Coffee Cake.Yum! Not dumb!

There are a just a few short weeks of strawberry bounty in my garden. I go all year with no strawberries, no strawberries, and no strawberries. Then I get one's and two's for a few days. And then, all of a sudden, wow! There are so many that even I can not eat them all, no matter how hard I try. (And believe me, I have tried.)

That is when I make strawberry jam. But there's only so much jam a girl can eat, even if she's making cookies with it. So I like to freeze some of those glorious berries .

Freezing strawberries is really easy. Here's how I do it: Rinse berries. Cut off the green tops. Slice them. Measure the slices. For every 2 cups of berries add about 1/4 cup of granulated sugar. Stir sugar into berries and let sit for a few minutes, until sugar seems to dissolve. Then vacuum pack them, or pour them into freezer containers, or just spoon them into freezer bags. I like to freeze them in 2 cup portions. Don't forget to label them!

Those frozen strawberries seem "almost fresh" to me (especially on a day like today). Since they were picked fresh and frozen almost immediately they are really only a few hours old, right? And what a treat to eat "fresh" strawberries on a day like today!

Thaw frozen berries and eat them straight out of the baggie with a spoon, or use them to make this fabulous coffee cake... c'mon, I'll show you how!STRAWBERRY SOUR CREAM COFFEE CAKE

2 cups cake flour
1 teaspoon baking soda
1/4 teaspoon salt
1/2 cup melted, then slightly cooled, butter
1 cup granulated sugar
2 eggs, beaten
1 cup sour cream
1/2 teaspoon lemon extract

2 cups frozen strawberries, thawed
1/2 cup granulated sugar (reduce to 1/4 cup if using berries that were frozen with 1/4 cup sugar added)

For topping:
1/2 cup all purpose flour
1/2 cup brown sugar
4 tablespoons melted butter
1/2 cup old fashioned oats
1/4 teaspoon salt
1/4 teaspoon ground cardamom

Preheat oven to 325 degrees. Butter a 9 x 11 sized baking pan.

Whisk cake flour, baking soda, and 1/4 teaspoon salt together in a bowl. Set aside.

In another bowl, beat 1/2 cup melted, slightly cooled, butter, granulated sugar, eggs, sour cream, and lemon extract.

Gently stir dry ingredients into wet ingredients. Don't over mix. And spread into buttered baking pan.

Puree strawberries and sugar in a blender or food processor. Pour over top of batter and spread as evenly as possible.

In a small bowl, stir together remaining ingredients. It will be a crumbly mixture. Sprinkle over top.

Bake at 325 degrees for about 45 minutes, until a knife inserted into the center comes out clean.

Serve slightly warm or completely cooled.

December 15, 2010

Shortbread Thumbprint Cookies

Did you ever make a pinch pot? Making thumbprint cookies kind of reminds me of making pinch pots.Press your thumb down into a little dough ball to form a tiny bowl in the cookie dough. Then fill that little bowl with something sweet and tasty! I like to fill them with a little glop of homemade jam or jelly.

For years, though, every time I made thumbprint cookies the jam bubbled out of the little dough holes while baking, resulting in messy looking cookies. But I think I have finally discovered the secret to making thumbprint cookies that look classy. The key is to not over fill the dough holes. Some people put their jam in a sandwich bag, cut a tiny corner out of the bag, and use the bag to pipe the jam into each cookie. This doesn't work for me. I always end up putting too much jam into each cookie this way. Using a teaspoon doesn't work for me, either. Again, I aways let too much jam fall into the cookie.

This time, though, it dawned on me... it's a tiny little cookie, so use a tiny little spoon! I remembered one that might work. It's a tiny spoon, passed down to me from my grandmother, a tarnished little travel souvenir from long ago. I dug through the silverware drawer and retrieved it.
Wouldn't you know, it worked like a charm! Not one cookie in the whole batch overflowed! And finally! A great use for this charming little spoon!

For the dough I use the Argo cornstarch Basic White Sugar Shortbread Cookie recipe. It makes a light crunchy buttery cookie that almost melts in your mouth. It holds it's shape when baked. And it's not overly sweet, complimenting the jam nicely. Since Argo has kindly shared the recipe on their site, I will reprint it here, with my adaptions for making Thumbprint Cookies.

SHORTBREAD THUMBPRINT COOKIES
(adapted from the Argo brand Basic White Shortbread Cookie recipe)

1 cup softened butter (no substitutions)
1/2 cup white sugar
1 teaspoon vanilla extract
2 cups all purpose flour
1/4 cup cornstarch
And a little bit of jam or jelly

Preheat oven to 300 degrees.

Mix butter, sugar, and vanilla together. (The Argo recipe says to use an electric mixer for this. I just mix it well with a spoon.)

In another bowl, use a whisk to blend flour and cornstarch together. Gradually add dry ingredients to wet ingredients, mixing well after each addition. (I begin mixing this with a spoon but eventually it is easier to mix and blend together by kneading it with my hands.)

Roll into 1-inch balls. Press thumb down into each ball to form a deep little bowl. Place on parchment lined baking sheet. (I do this in case I spill jam onto the baking sheet.)

Put a little glop of jam (or jelly) into each cookie bowl. Try to only half fill each little bowl.

Bake for 25-30 minutes.

June 16, 2010

Strawberry Jam

It's hard to believe that these delicate little yellow and white flowers can become sweet juicy red strawberries. But it's true... they did. Mother Nature cast her rain and smiled her sun on those flowers and turned them into this bowl of beautiful strawberries.

Oh My Gosh. Isn't she a miracle maker?

I pluck a strawberry and pop it in my mouth every time I pass by the strawberry patch. How could I resist?? The little red candies, um, I mean fruit, tempt me in the most neverending way.

But I have put up some jam to share that fresh strawberry taste with friends and family, too. A jar of homemade jam makes a delightful gift. When you lift the lid off a jar of homemade strawberry jam it's like releasing a moment of summertime, regardless of what season your calender says it is.

Jam can be made the old fashioned way, by cooking it until it gels just right. I have had success making jam this way. I have also had failures doing this.

Adding commercial pectin cuts out the potential for most failures. Jam only needs to cook for about a minute when you add commercial pectin. And I believe the fruit maintains more nutrients and taste because it doesn't have to cook so long... but don't quote me on that. I'm not a nutritionist. I'm only a homegrown countrygirl.

Commercial pectin comes in liquid and powder form. I like the Ball Blue Book recipe for strawberry jam. It's simple. It's easy. And it's quick. It uses powdered pectin. The folks at Ball have been kind enough to post their strawberry jam recipe on their website. You can view it here.
Let's hear it for strawberry jam!

July 31, 2009

Blackberry Jam

In the middle of winter, when the wind is blowing and the snow is piling up in drifts, there is nothing that is more rewarding than popping open a jar of homemade blackberry jam.

I say this about a lot of home grown, home preserved things. But it might be the most true about blackberry jam.

Jam is really easy to make and can. And quick. You can make a batch of jam in less than an hour, including clean up time! If I have plenty of berries I make extra batches blackberry jam. One year when it wasn't a very good summer for blackberries I was glad to have made extra jars of it the year before.

And don't forget, a jar of homemade jam makes a delightful gift!
If you purchase a box of powdered pectin you will find a simple recipe, including detailed instructions for home canning jams, inside the box of pectin. I have never had a failure following these instructions. But there is a lovely recipe in The Ball Complete Book of Home Preserving that I also like to use. It is labeled "Chocolate Raspberry Sundae Topper." It turns out just like jam. I substitute blackberries for the raspberries since they have similar acidity. I call it "Chocolate Blackberry Jam." The subtle taste of cocoa in this jam is divine.

One thing is for certain. When berry season is over, you will be glad to have made either one of these jams.

July 28, 2009

Some Rambling about a Blackberry Bramble

You have to battle thorns, ticks, mosquitoes, snakes, and poison ivy in order to fill your poke with these delectable wild black berries.

But it's totally worth it.

Blackberries are more than just a sweet bite of heaven. They are very healthful. The tiny seeds are packed with antioxidants. I feel younger every time I eat them! Oftentimes the terms "blackberry" and "black raspberry" are used interchangeably. But actually they are two different kinds of berry. Of course they are both delicious. And they are both healthy. And they can be easily substituted for one another in most recipes. But if you want to know which kind of berry you are gathering, there are a couple of ways to tell the two apart. One way is by looking at the stem of the plant. Blackberry stems have vertical grooves on them.
Another difference is that when you pick a black raspberry the nubby white core of the berry is left on the plant. And there is a hollow spot in the middle of your berry. Picked blackberries don't have a hollow middle. Immature blackberries start out green and then turn bright red before they ripen into a juicy purplish black berry.
I have heard that there are possibly hundreds of different varieties of blackberries. Some grow upright. Some grow low along the ground.

Smart people grow blackberries in their garden or around their home and keep it neat and weeded. I am obviously not one of those people... I would not have to be a detective to know what kind of berry I was picking if I had planted them myself! Instead, I plod through thorny ticky brambly brush in the fence rows of a pasture to get mine.

If I was smart I would not have a poison ivy rash.

Please excuse me now. I have to go douse myself in calamine lotion.

June 21, 2009

Mulberry In Your Eye Pie

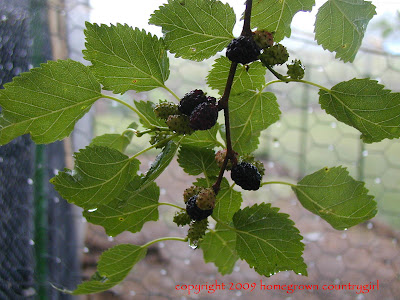
Mulberries are low in calories and are a good source of Vitamin C. They also have a little bit of protein and fiber. And they are sweet and tasty.

Mulberries are also a major cause of purple bird poop. So if there is a mulberry tree growing nearby you probably know about it. But let's try to stick to one of it's better points for now... mulberries make a terrific pie!

A good way to gather your mulberries is to lay tarps down under the tree and then shake, jiggle, rustle, or hang on the branches so that the ripe berries fall onto your tarps.

Another way is to pick the berries individually, standing under (or climbing in) your tree. If you do it this way you may want to wear goggles because something will always get into an eye. I know this for a fact.

I'm just sayin'. This recipe didn't acquire it's name without merit.

Mulberry in Your Eye Pie
3 cups fresh mulberries
1 1/4 cups sugar
1/2 cup flour
1 tablespoon cold butter
pie crust for 2 crust pie (recipe for a homegrown whole wheat one here)

Gently rinse mulberries in a colander and shake most of the water off. Remove stems if desired. (I don't.) In a large bowl whisk sugar and flour together. Add mulberries and stir lightly. Place bottom pie crust in a regular (not deep dish) pie pan. Pour berries in. Pinch off pieces of butter and dot berries with it. Cover with top crust. Poke holes in top crust with a fork and finish off edges as desired. Let unbaked pie rest in fridge for about 30 minutes before baking. Preheat oven to 400 degrees. Bake pie for 15 minutes at 400 degrees. After 15 minutes reduce heat to 350 degrees and bake for another 30-40 minutes. Let pie cool to room temperature before serving.